I believe the next “big thing” in dentistry is the implementation of digital dentistry, especially for the dental implant practice. Similar to how Cerec and E4D became wildly popular solutions for in-office design and milling of restorations, 3D printing is so close to becoming the next necessary workhorse for the dental and dental specialty practice.
Here are a few of its most exciting solutions:
- Printing multiple dental arches for in-office fabrication of clear aligner orthodontic appliances.
- Printing of implant surgical guides based on virtually planned surgeries
- Printing custom occlusal guards and TMJ splints
- Printing temporary restorations
- Printing other surgical guides (guided biopsy, guided ridge split, guided sinus lift, etc.)
As is the case with nearly all new technologies, as the proprietary season comes to an end and commoditization has its way, 3D printing technologies will become much more affordable and easy to implement into not only the specialist’s, but the general practitioner’s office as well.
We will be sharing some more detailed content in the future, but I wanted to write this post to introduce the digital workflow that is followed to plan and create a surgical implant guide. More and more of my colleagues are climbing the steepish learning curve of virtual surgical planning and guided implant surgery, but there are still many practitioners who haven’t been exposed to these concepts so I’ll keep it very straightforward.
In order to do virtual surgical planning whether for dental implants or orthognathic surgery, one always starts with some basic elements.
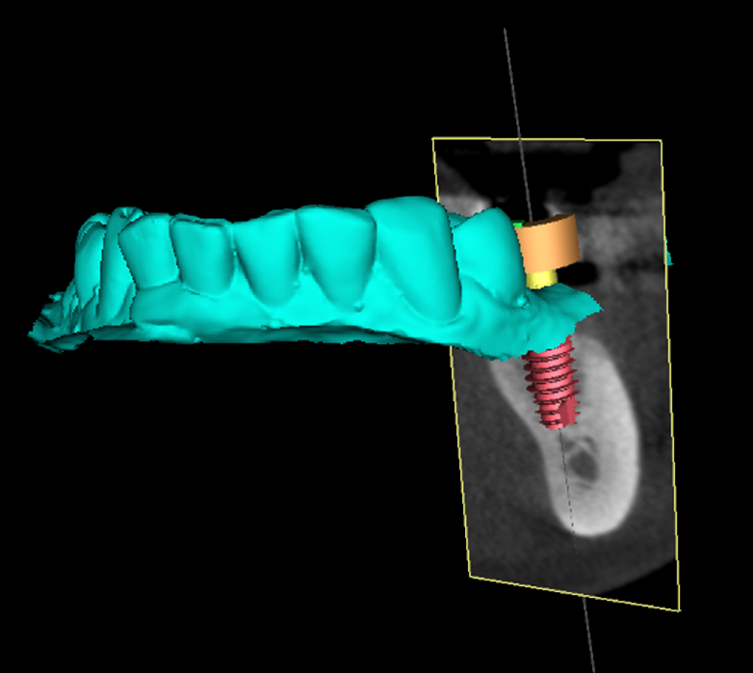
- Cone Beam CT – A cone beam CT image is taken because only three dimensional information can be used to plan a surgery that will take place in three dimensions.[spacer height=”20px”]
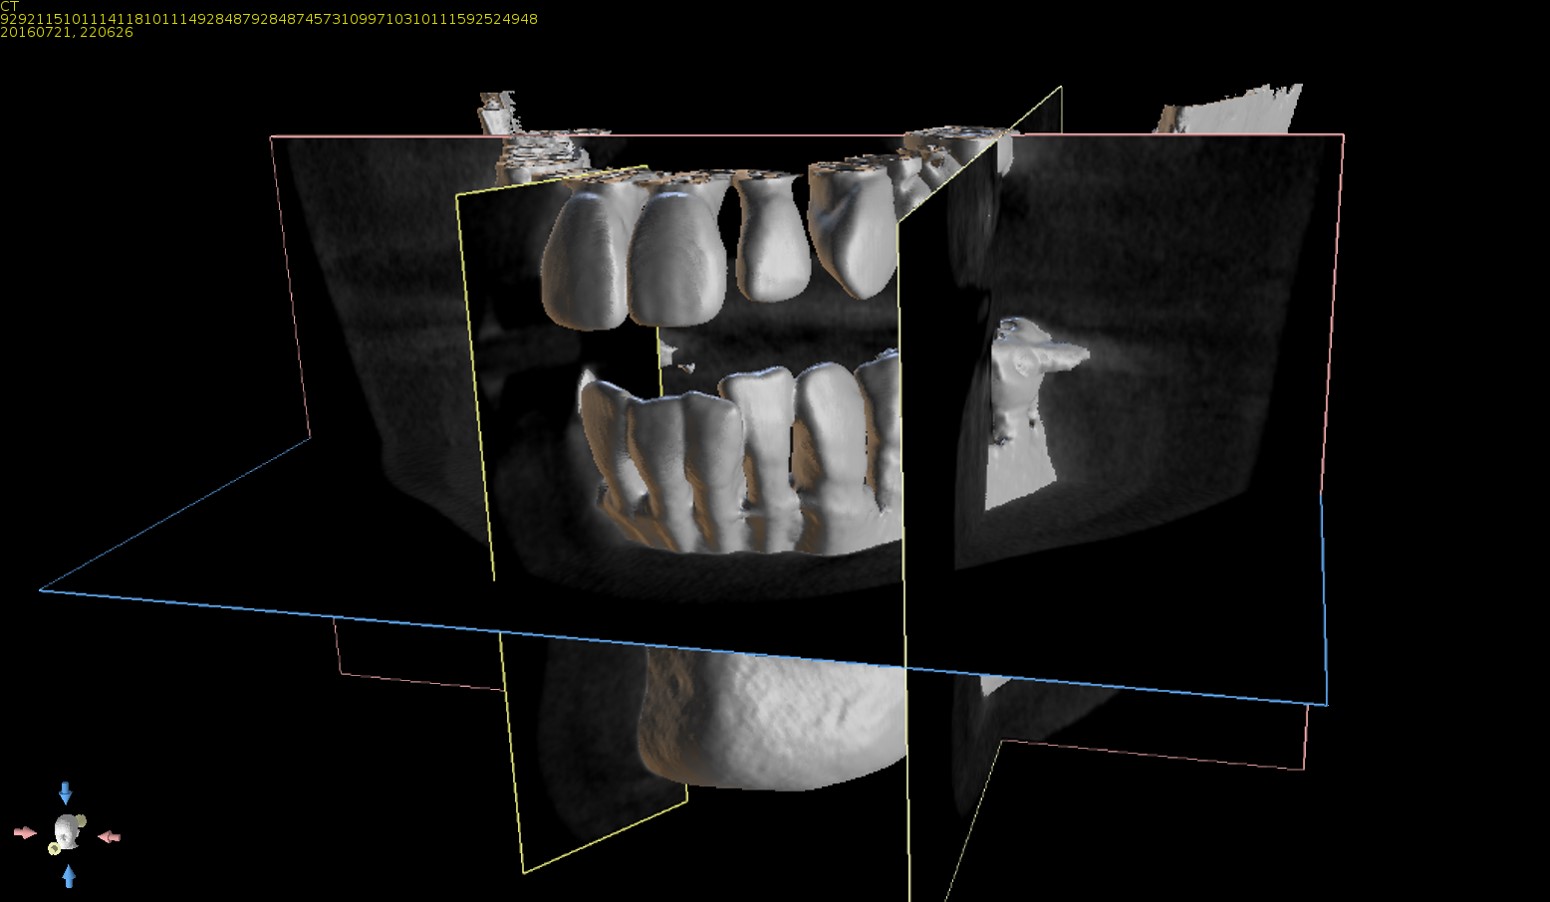 [spacer height=”20px”]
 - Digital Impression – While traditional treatment planning has made use of waxups done on a model, a digital impression of your patient’s existing dentition or a digital version of a waxup of your treatment plan will be necessary. When an object is digitized it is converted into data that can be manipulated and interacted with on a computer program. The most common type of file that I interact with when doing virtual surgical planning is dubbed “.stl”; a shortened abbreviation for “STereoLithography”. Without getting too technical and losing your attention, an STL file is simply mathematical data that your computer can display to you in a visual way. One might ask, “Why not just use the dental data captured during the cone beam CT?” This is an excellent question. While it is true that the CT does show us the patient’s teeth, it is not topographically refined or accurate enough if we want to create an object like a surgical guide. A surgical guide needs 50-100 micron accuracy in order to fit well upon our patient’s teeth and stay true to our surgical plan. A cone beam CT when rendered to show us three dimensional data often will have inaccuracies in the teeth, especially if they have any restorations since restorations cause a lot of scatter and mis-information. [spacer height=”20px”]
 [spacer height=”20px”]
 - Planning – Once we have our CT and our digital version of our patient’s teeth or our restorative plan, we use computer software to merge the two. Once they are perfectly aligned, we then have the perfect foundation upon which to do surgical planning (meaning figuring out where to put our implant in bone) and ensure that it will be in perfect harmony with our restorative plan (meaning we’ll be able to ensure our implant position allows us to achieve our restorative plan). Guided surgery truly allows us to combine the surgical and restorative planning at once, the lack of which has been at the root of many implant related complications over the years. [spacer height=”20px”]
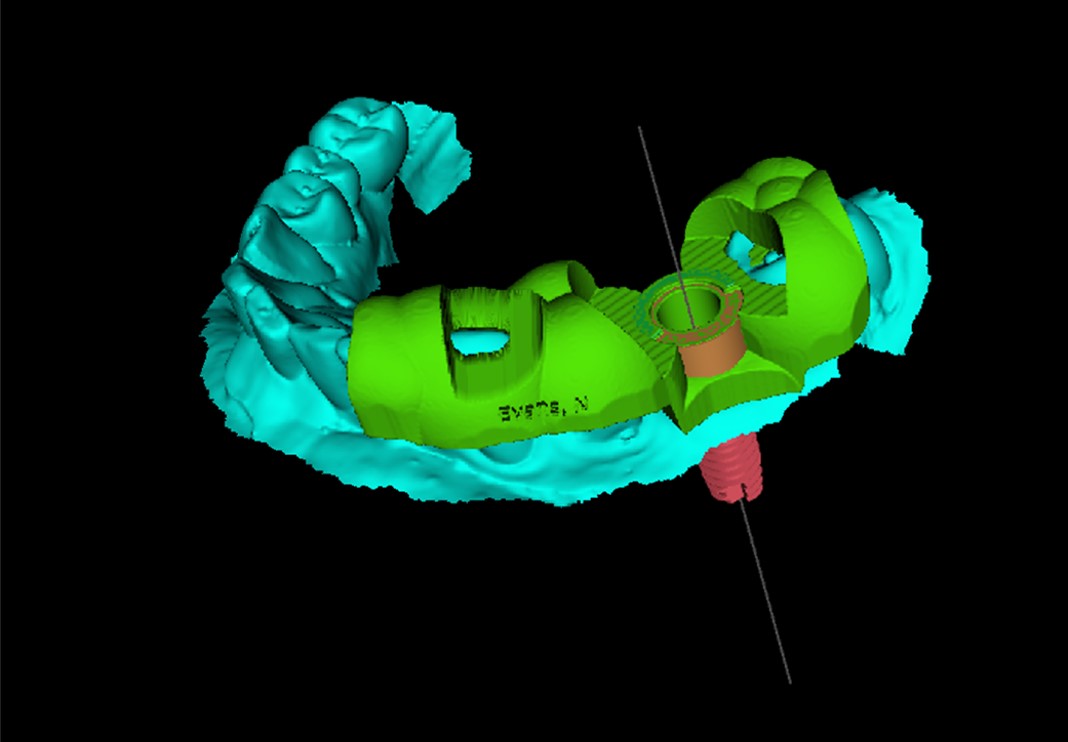 [spacer height=”20px”]
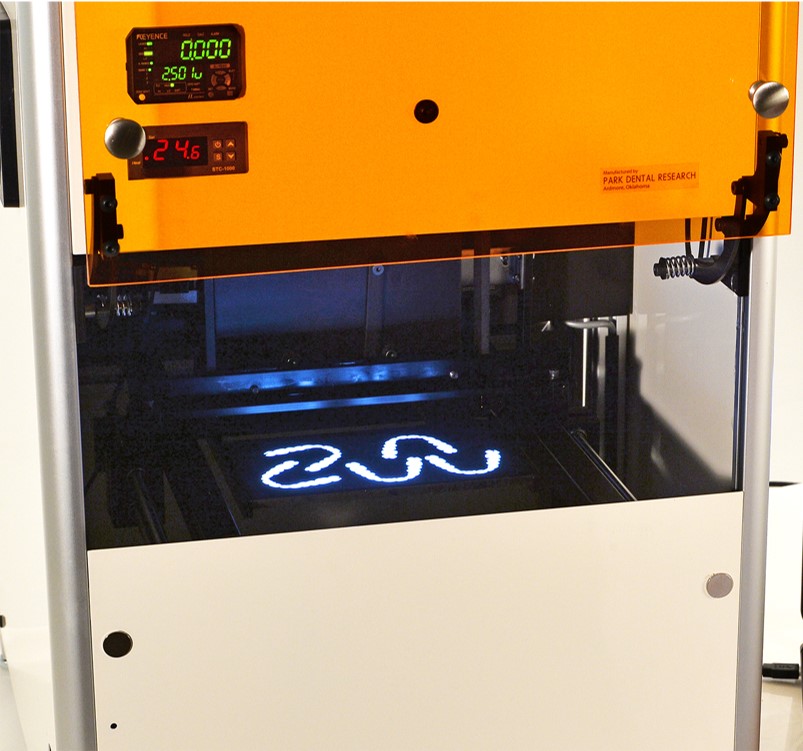
 - Guide Fabrication – The same computer software is used to take our plan and generate for us a new .STL file. This new .STL file is a digital version of our surgical guide. Now the process reverses itself. Where we initially took our patients teeth and made a digital version of them, now we take a digital version of our surgical guide and need to make it real. This is what the 3D printer does. It takes an STL file and fabricates it.[spacer height=”20px”]
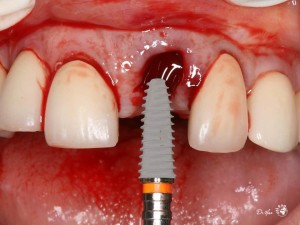
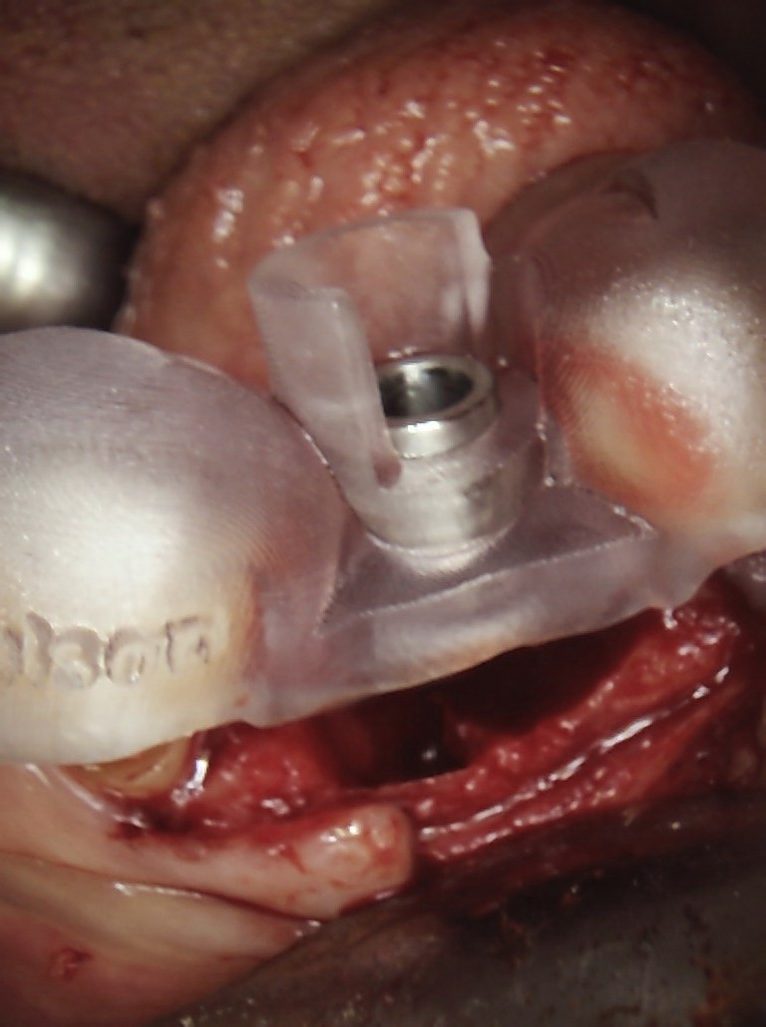 The last picture is the surgical guide in place over a recent extraction socket. With this planning and guided technology, an immediate implant in a lower molar site is quick and easy with much better accuracy than had it been placed traditionally. Hopefully this helps illustrate the stepwise concepts in virtual surgical planning and guided surgery using 3D printed guides.